

The process of removing, replacing, and reinstalling the piston assembly for the Biohit/Sartorius mLINE, eLINE, Proline Plus, Tacta, Picus, and Picus NxT single channel pipettes requires great care, a high attention to detail, patience, and steady hands. Please dedicate a good work area with good lighting and space where small parts can be located should they pop/fly out during disassembly. Pipette damage and lost parts may occur if attention to detail is not maintained. Please proceed at your own risk.
Replacement Parts:
- Pistons
- Replacement Seals
Note: Not all seals are available, but they can be purchased with the full lower assembly or the individual pistons.
Recommend Supplies:
- Gloves
- KimWipes
- Coated Needle Nose Pliers(non-marring)
Preliminary Note:
This disassembly process applies to the single-channel variants of each listed model. It is also recommended to inspect and replace the seal and any damaged components of the lower assembly during this procedure.
Step 1:
Adjust the pipette to its lowest volume setting. This allows for easier removal and installation of the piston.

Step 2:
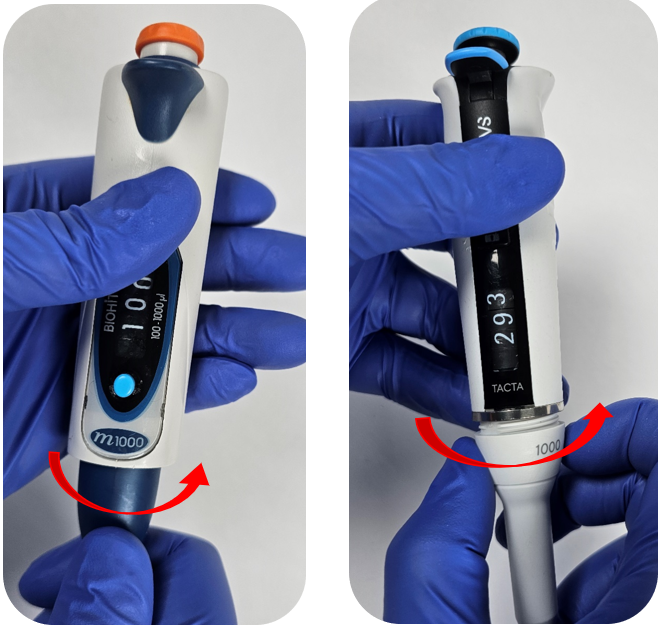
Unscrew the tip ejector sleeve in a counter-clockwise direction from the lower half of the pipette body.
Note: When removing the tip ejector for the Tacta, make sure to unscrew the ejector on the beveled edge below the silver ring on the body of the pipette.
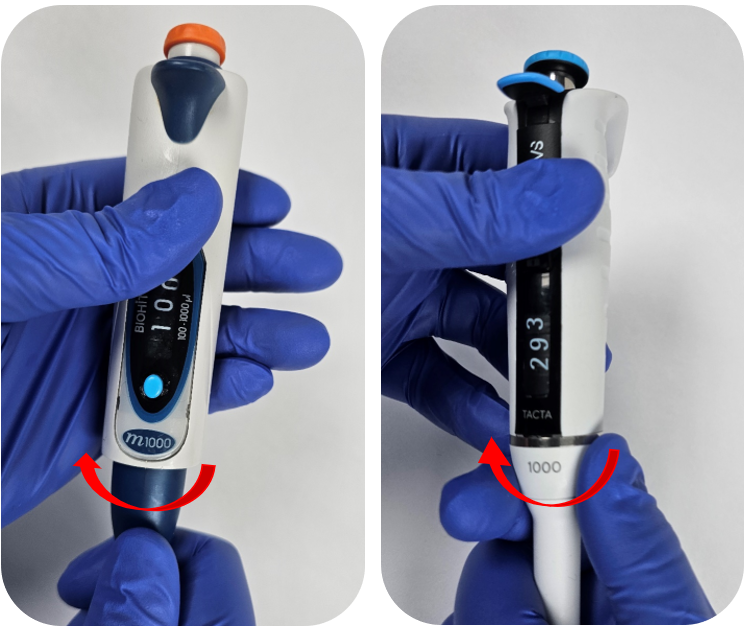
Step 3:
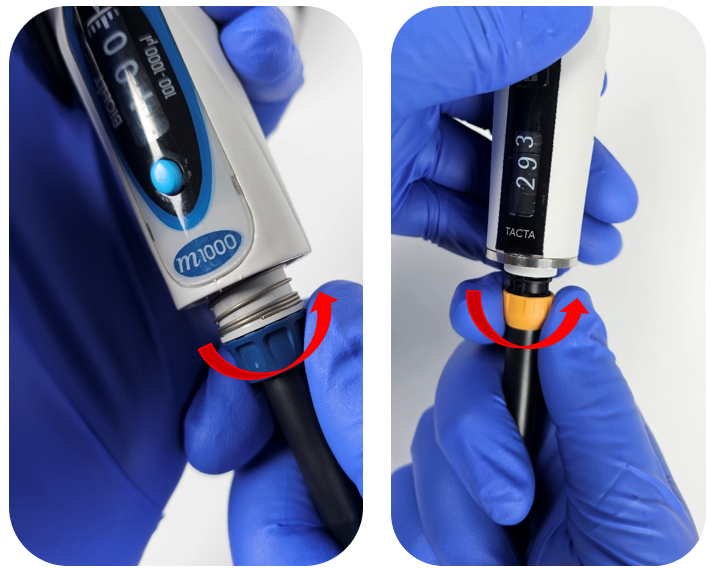
Unscrew the connecting nut counter-clockwise from the tip cone.
Once disengaged, gently pull down on the tip cone to remove it from the pipette.

Step 4:
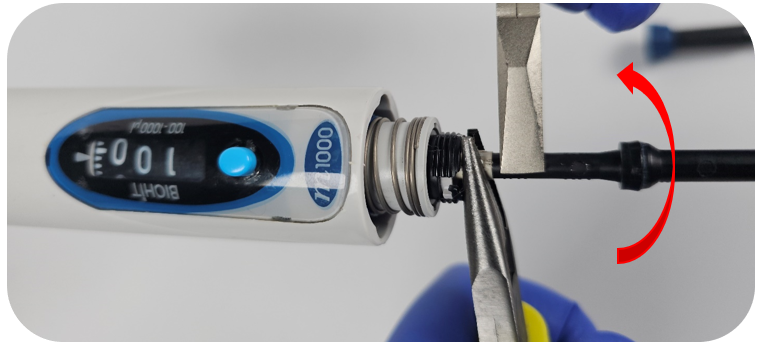
To remove the piston, use a pair of coated needle-nose pliers to grip the operating rod.
Note: Use pliers with a rubber or plastic coating to prevent damage to the plastic operating rod. If coated pliers are unavailable, wrap two layers of a nitrile glove around the operating rod to minimize the risk of damage while using pliers.
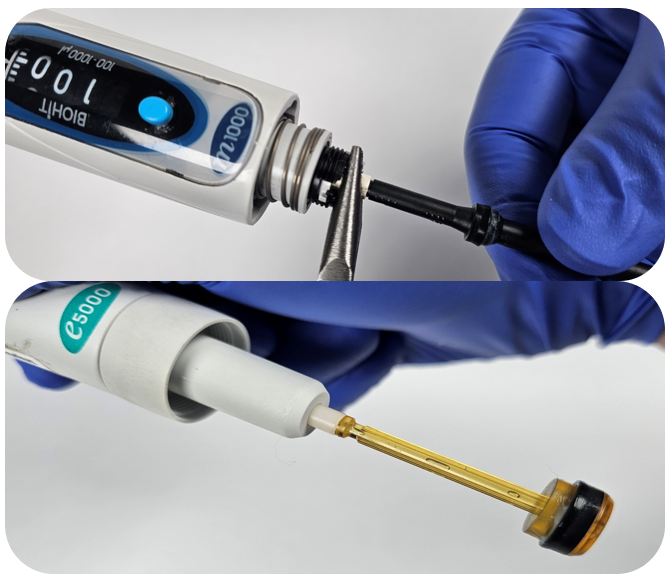
Step 5:
While holding the operating rod with the pliers, rotate the piston counter-clockwise to loosen it. The piston is usually hand-tightened, but you may need an extra set of coated pliers to remove it.
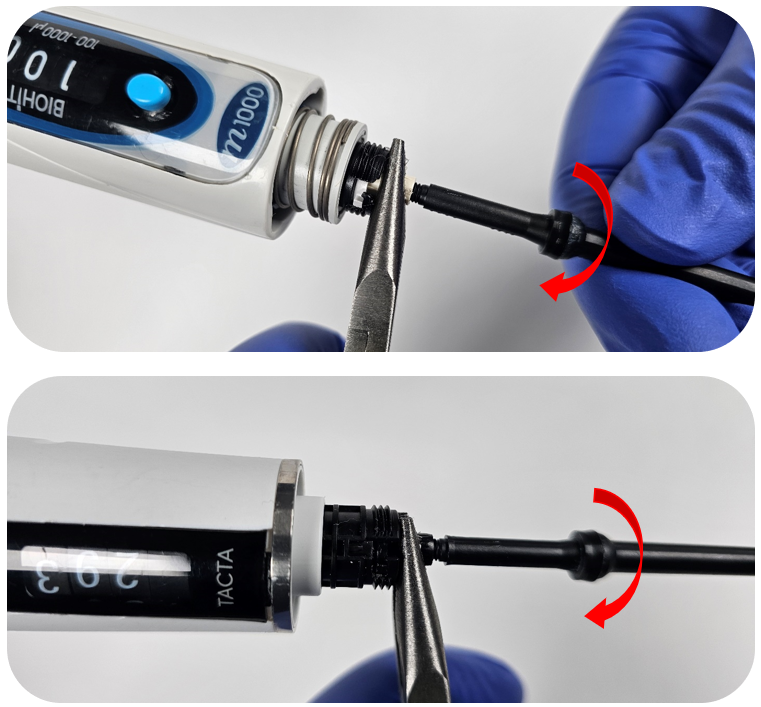
Step 6:
Inspect the seal before reassembly. If it appears cracked, deformed, or worn, it should be replaced.

Step 7:
Install the new Sartorius piston by threading the threaded end into the operating rod clockwise.
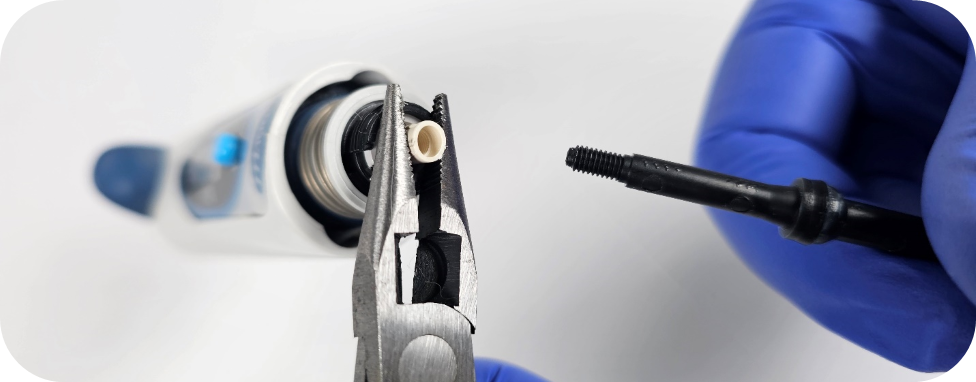
After tightening by hand, an additional pair of coated needle-nose pliers can be used to snug up the piston if needed.
Caution: Do not overtighten. Overtightening may cause damage to the threaded operating rod.
Step 8:
After confirming the seal is in good condition, reattach the tip holder and secure it with the connecting nut.
Step 9:
Reattach the ejector sleeve by threading it back onto the ejector assembly.
Step 10:
After replacement of the piston, it is a good idea to check the pipette to ensure it is operating within manufacturers specifications.
Disclaimer: Any action you take using the information on this website is strictly at your own risk. The information herein does not constitute professional advice and is general in nature. We make no warranty that this information will meet your requirements, be safe, accurate, or error-free. Pipette Supplies, Inc. is not responsible for any errors or omissions, any results obtained from the use of this information, or any loss or damage arising out of the use of this information. This site is for educational purposes only.
Fair Use: Copyright Disclaimer under section 107 of the Copyright Act of 1976, allows for “fair use” for purposes such as comments, criticism, teaching, scholarship, news reporting, and research.
Fair use is permitted by copyright statute that might otherwise be infringing.
Related Posts:
Sartorius Picus: Handle Assembly/Disassembly
How to Adjust the Calibration for a Sartorius mLINE Single Channel Pipette
How to Replace the Tip Ejector Mechanism on a Sartorius mLINE Single Channel Pipette
Sartorius mLINE 5000uL Single Channel Piston Cleaning & Preventive Maintenance
Replacing a Damaged or Missing Sartorius mLINE Volume Display Window