
The process of performing preventative maintenance for the Gilson Pipetman (formerly Pipetman G) and Pipetman L requires great care, a high attention to detail, patience, and steady hands. Please dedicate a good work area with good lighting and space where small parts can be located should they pop out during disassembly. Pipette damage and lost parts may occur if attention to detail is not maintained. Please proceed at your own risk.
Replacement Parts:
The 2µL, 5mL, and 10mL models use the same seal and o-ring as the Pipetman Classic and Neo. Additionally, the Pipetman single channel has now replaced the Pipetman G. The new model uses the same parts as the Pipetman G.
Recommend Supplies:
- Gloves
- Cotton Swabs
- Lint Free Wipe
- Isopropanol (rubbing alcohol)
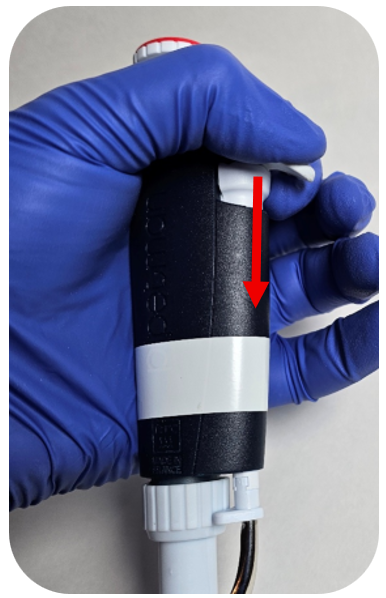
Step 1:
Press down the ejector button to expose the ejector clip.
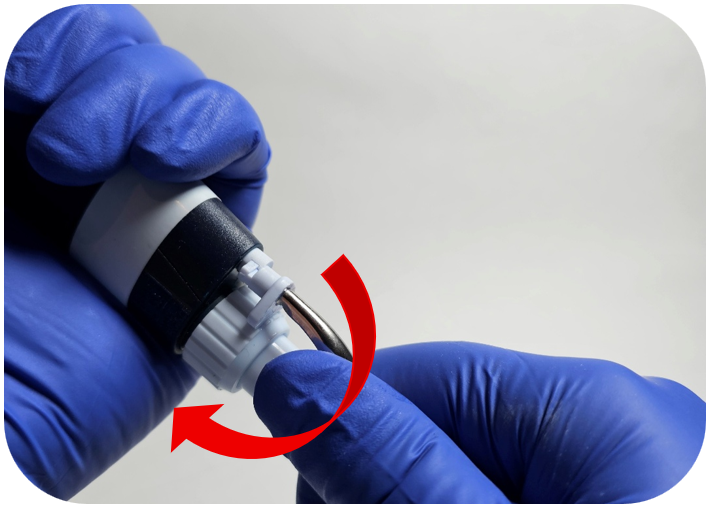
Step 2:
While holding the ejector button down, turn the tip ejector counterclockwise to unclip it.
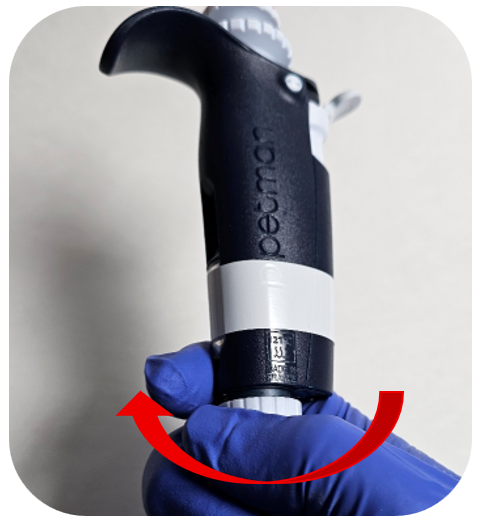
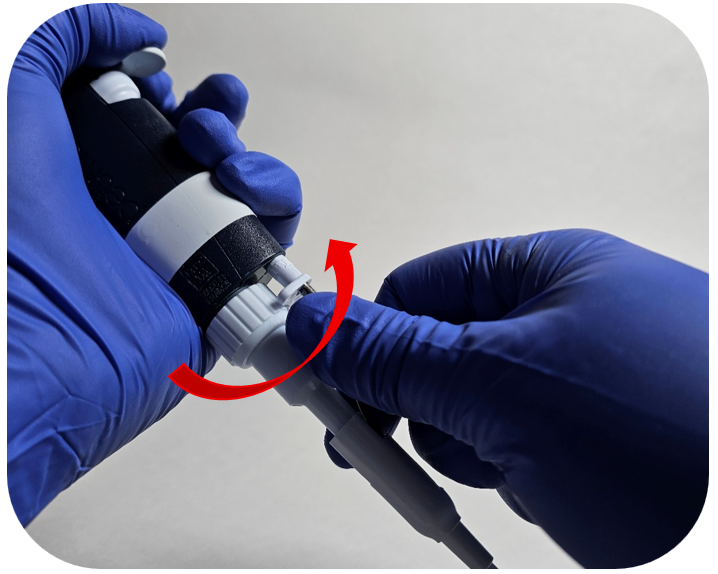
Step 3:
Turn the connecting nut counterclockwise to remove it from the pipette body.
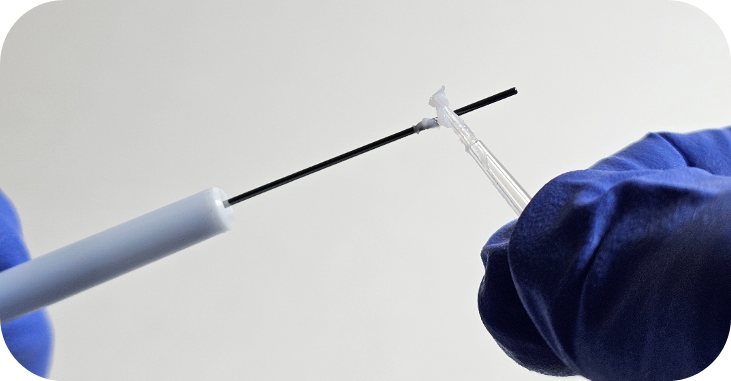
Step 4:
Remove the piston assembly from the tip holder.

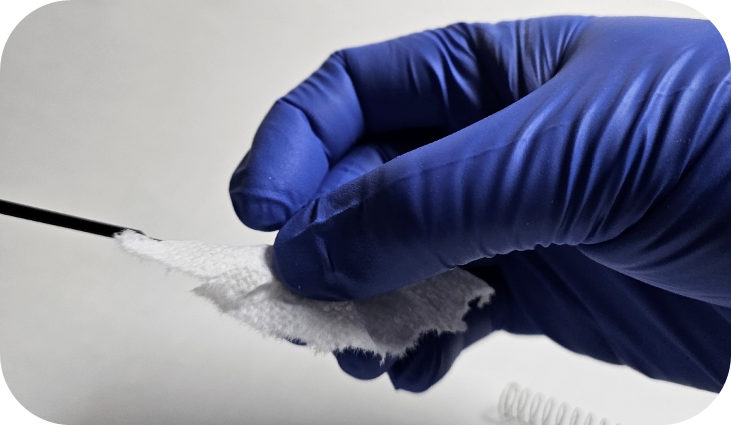
Step 5:
Inspect the tip holder for any debris or seals/o-rings.
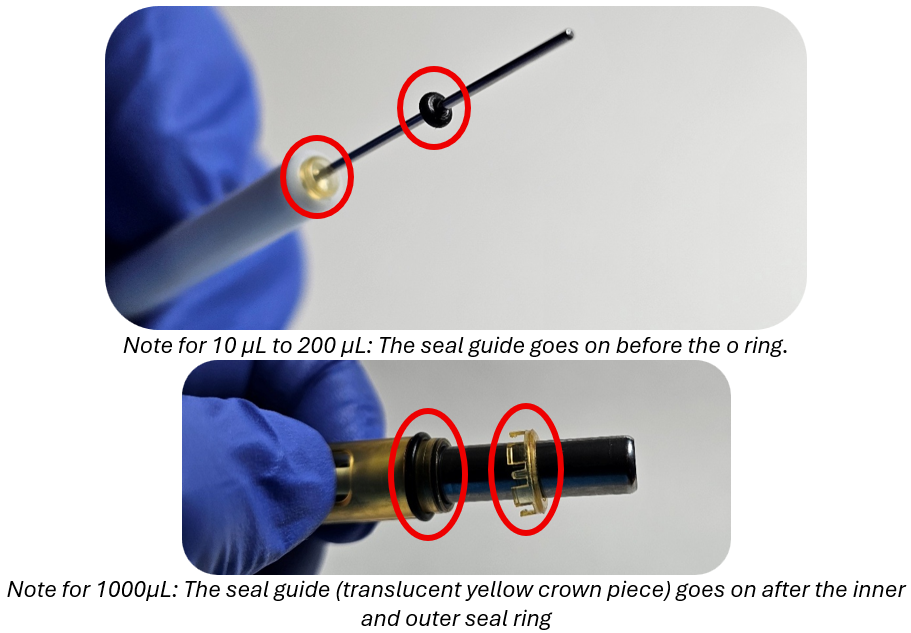
Step 6:
For 10µL to 1000µL models:
Remove the seal guide and o-ring (or the inner and outer o-rings on the 1000 µL model) from the piston.
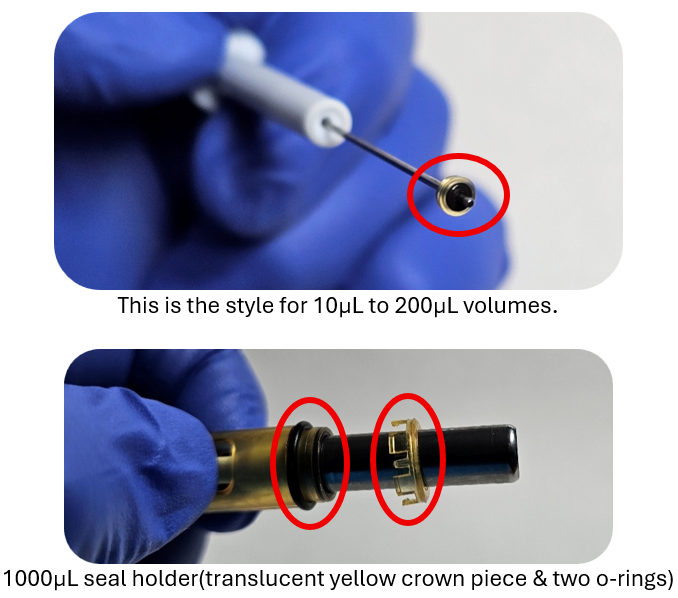
For 2µL, 5mL, and 10mL models:
Remove the seal and o-ring from the piston.
Step 7:
Clean the piston assembly using a lint free wipe moistened with isopropanol. Allow it to dry, then apply Gilson Pipetman G/L Grease.
Step 8:
For 10µL to 1000µL models:
Install the seal guide and new o-ring (or inner and outer o-rings on the 1000µL model) onto the piston.
For 2µL, 5mL, and 10mL models:
Install the new seal and o-ring onto the piston.
Step 9:
Reinsert the piston assembly into the tip holder and push it upward toward the pipette body.

For 5mL and 10mL models: Thread the tip cone onto the piston assembly.
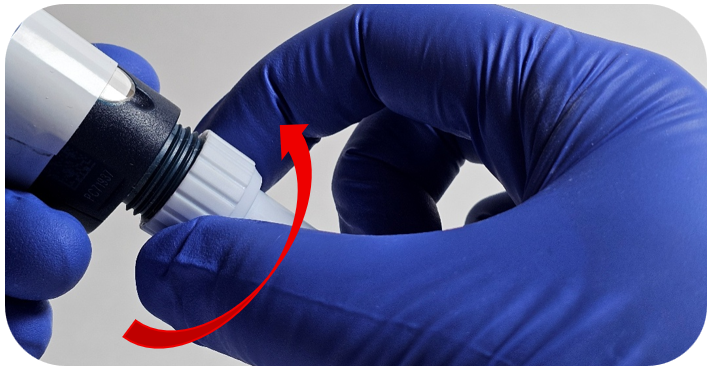
Step 10:
Turn the connecting nut clockwise to secure it to the pipette body.
Note: For 5mL and 10mL models, the piston assembly will thread directly into the pipette body.
Step 11:
While holding the ejector button down, turn the tip ejector clockwise to clip it into the ejector assembly.
Related Posts:
Gilson Pipetman Neo, G, & L Multichannel – Lower Assembly Disassembly
Gilson Pipetman L – Counter Assembly Replacement
Pipetman L Ejector Maintenance
Gilson Pipetman L Calibration Tool, Item # 28888
Disclaimer: Any action you take using the information on this website is strictly at your own risk. The information herein does not constitute professional advice and is general in nature. We make no warranty that this information will meet your requirements, be safe, accurate, or error-free. Pipette Supplies, Inc. is not responsible for any errors or omissions, any results obtained from the use of this information, or any loss or damage arising out of the use of this information. This site is for educational purposes only.
Fair Use: Copyright Disclaimer under section 107 of the Copyright Act of 1976, allows for “fair use” for purposes such as comments, criticism, teaching, scholarship, news reporting, and research.
Fair use is permitted by copyright statute that might otherwise be infringing.
