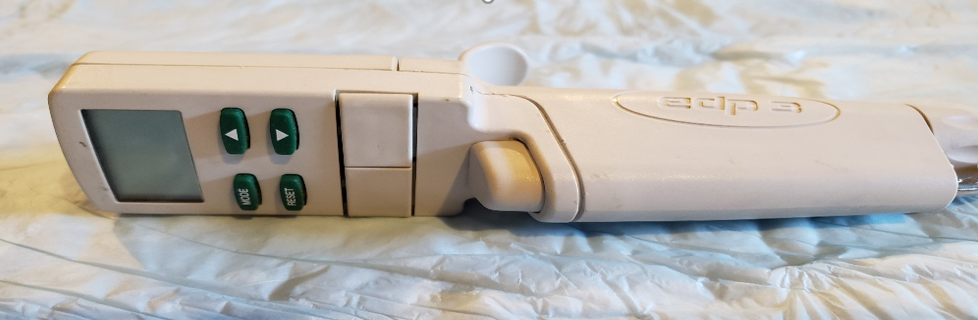
Learn how to perform crucial preventative maintenance on your Rainin EDP3-Plus pipette.
In this post:
Krytox Oil RA 6100-065
Seals
O-rings
Shafts
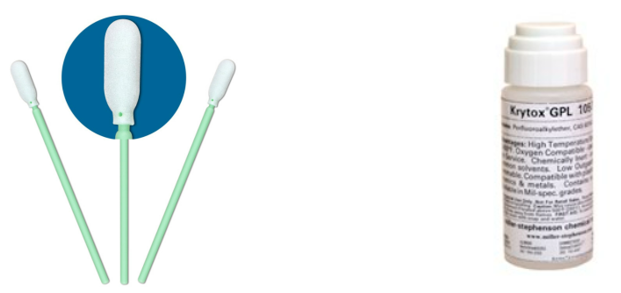
Recommended Equipment for EDP3-Plus Preventive Maintenance:
- Laboratory gloves
- Krytox GPL-105 Oil (Pipette Supplies: RA 6100-065)
- Foam Swabs for applying Krytox Oil & cleaning
- Kim Wipes & 70% IPA
- Replacement PM parts (as needed): Seal, O-Ring, Shaft
- Small-bladed flat head and Phillip screwdrivers
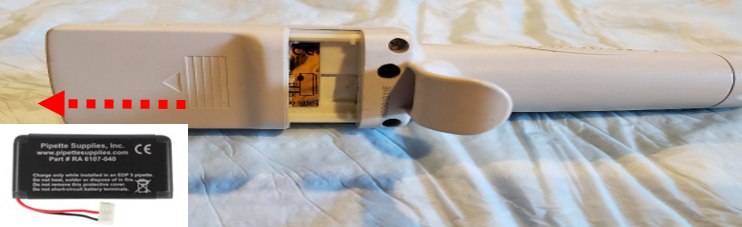
Step 1:
Remove the battery from the EDP3-Plus to lock the motor in the home position and to prevent movement during preventive maintenance. This is accomplished by sliding the battery door upward and disconnecting the battery from the battery port.
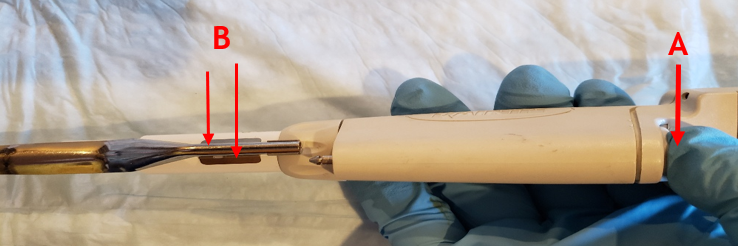
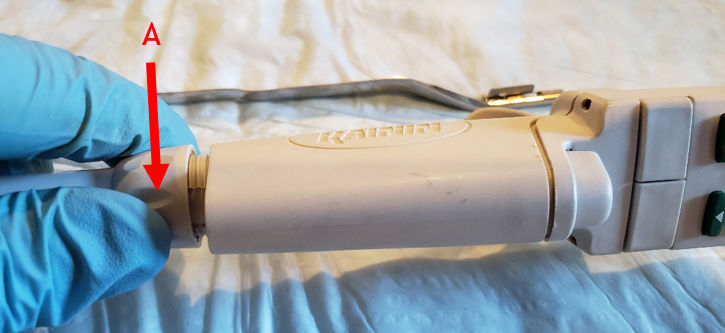
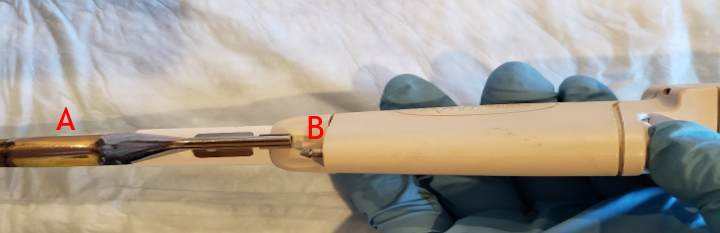
Step 2:
Press down the tip ejector button (A), then press down on the tip ejector clips (B) to disengage the tip ejector from the pipette. Lay the tip ejector arm a side for reassembly later.
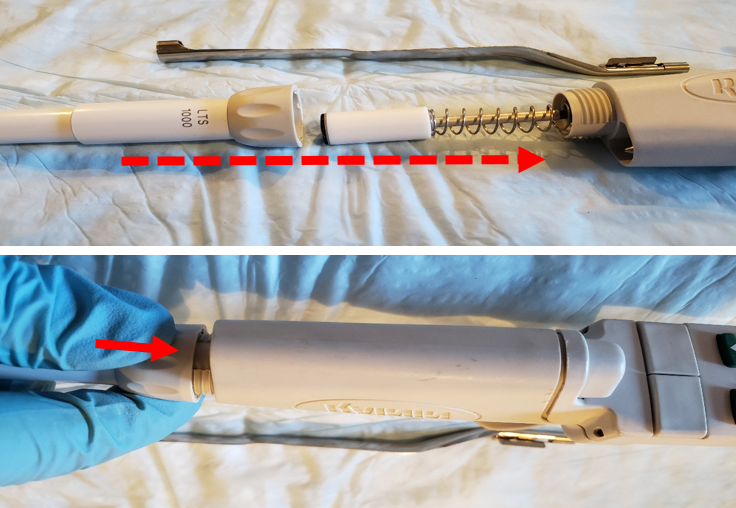
Step 3:
Unscrew and fully remove the coupling nut (A) from the pipette
CAUTION: There is an internal piston spring that may cause the seal and o-ring to shoot out of the shaft when removed. Be alert for parts that might pop off.
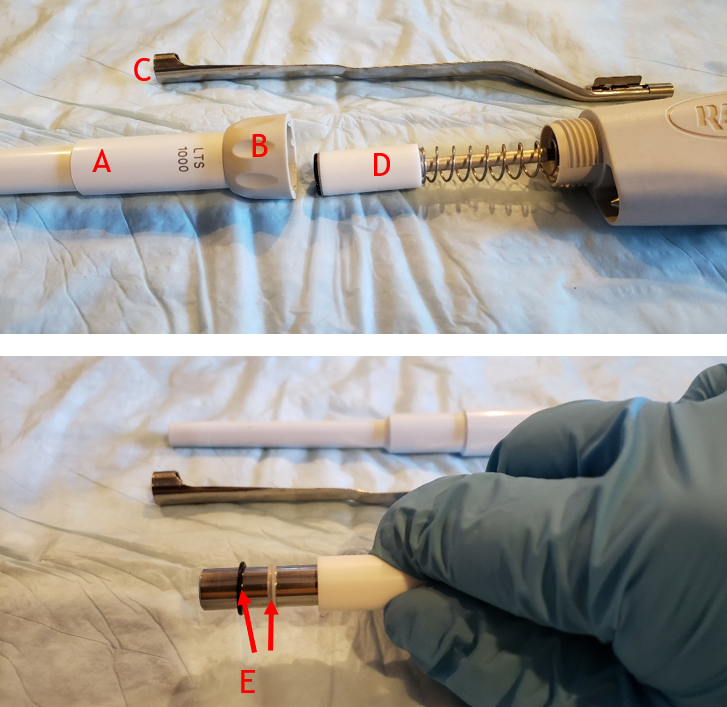
Step 4:
Ensure that the following parts are accounted for after removing the shaft from the pipette
A. White shaft
B. Tan coupling nut
C. Tip ejector arm
D. Piston assembly w/ spring
E. Seal and o-ring
CAUTION: There is an internal piston spring that may cause the seal and o-ring to shoot out of the shaft when removed. Be alert for parts that might pop off.
Step 5:
With the seal and o-ring removed, clean/wipe the piston with a clean kim wipe to remove any lubricant, chemical splash, or debris, from the piston.
IMPORTANT: Only wipe the piston once with the kim wipe and discard. If additional wiping is needed, use a fresh kim wipe for each additional wipe to prevent scratching the piston.
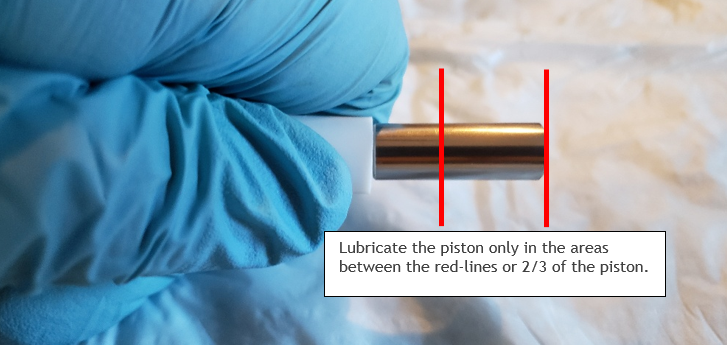
Step 6:
Once the piston is fully cleaned, apply a minute amount of Krytox oil onto a foam swab. Lightly coat the piston with the Krytox oil in between the red lines, as shown to the left (only 2/3 of the piston).
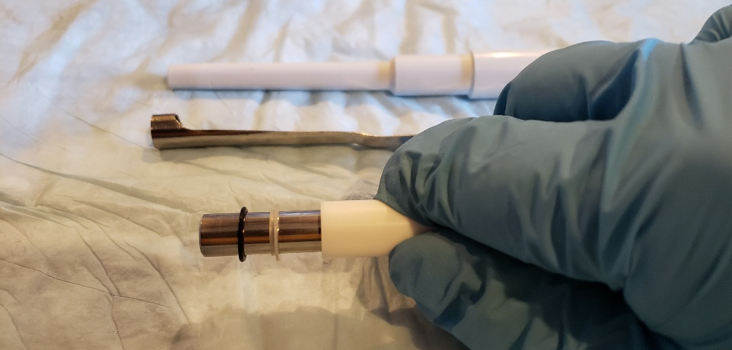
Step 7:
Install a new seal on the piston followed by the black o-ring on the piston, as shown.
NOTE: Pay attention to the orientation of the seal when installing onto the piston. Clean/replace the shaft as needed.
Step 8 Reassembly:
Once the seal and o-ring are installed onto the piston, place the coupling nut onto the shaft, as shown.
Step 9:
Screw the shaft and shaft coupling nut onto the pipette body until it is fully threaded and secure.
Step 10:
Reattach the tip ejector arm (A) until it clicks back into place on the ejector rod (B).
Step 11:
Allow the pipette to equilibrate at least 60 minutes before verifying accuracy and precision. Recheck work as necessary.
Note: Adjusting the calibration on this pipette is performed only with proprietary software by RAININ. If the pipette is not accurate and/or precise after preventive maintenance, kindly recheck your work. If the seal, o-ring, shaft, and piston are in good condition, but the pipette is still out of tolerance, accuracy and/or precision wide, please contact the manufacturer as this is a discontinued pipette model.
Related Posts:
Rainin Pipet Lite XLS/XLS+ and Pipet-Lite Models: Counter Assembly Replacement
Rainin Push Rod Ejector Assembly Replacement
Rainin Pipet-Lite, XLS, XLS+ Single Channel Pipettes: How to Perform Liquid End Assembly Preventive Maintenance
Seal/O-Ring Vs. Lip Seal for Pipet-Lite, Pipet-Lite XLS, and E4-XLS Models
Pipet-Lite, XLS, XLS+ Calibration Tool, Item # RA CT-2
Disclaimer: Any action you take using the information on this website is strictly at your own risk. The information herein does not constitute professional advice and is general in nature. We make no warranty that this information will meet your requirements, be safe, accurate, or error-free. Pipette Supplies, Inc. is not responsible for any errors or omissions, any results obtained from the use of this information, or any loss or damage arising out of the use of this information. This site is for educational purposes only.
Fair Use: Copyright Disclaimer under section 107 of the Copyright Act of 1976, allows for “fair use” for purposes such as comments, criticism, teaching, scholarship, news reporting, and research.
Fair use is permitted by copyright statute that might otherwise be infringing.
