How to Replace the Volume Catch on an Eppendorf Reference 2 Pipette
The process of replacing the left and right-side volume catch, internal springs, and tab levers is a careful process that could damage the pipette if attention to detail is not maintained. Volume catch replacement requires a high level of patience and steady hands. Please dedicate a good work area with good lighting and space where small parts can be located should they pop/fly out during disassembly. Please proceed at your own risk.

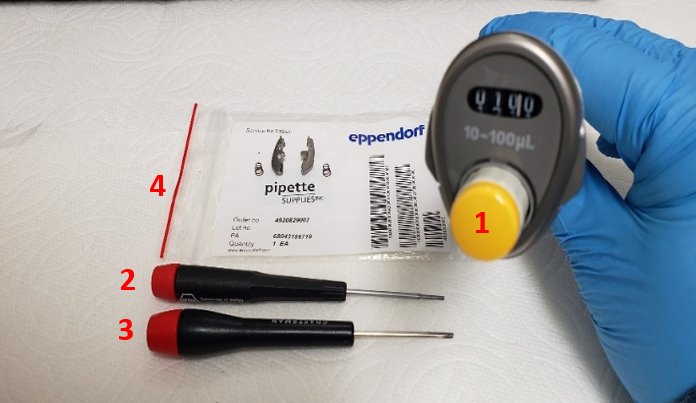
Equipment and Supplies Needed:
- Eppendorf Reference 2 Pipette
- A primary small-bladed tool such as a flat-head screwdriver
- A secondary small-bladed tool such as a flat-head screwdriver (as a back-up if needed)
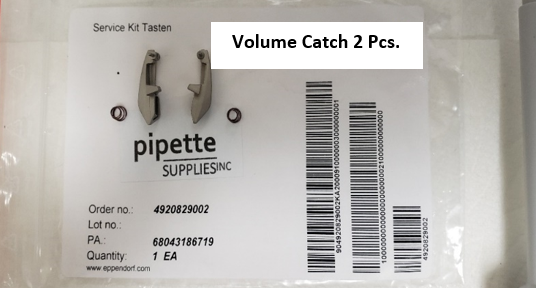
- Volume Catch replacement parts, 2 pcs, Part # EP 4920829002
Step 1:
Verify and ensure that you have the PipetteSupplies.com Reference 2 Volume Catch replacement parts, 2 pcs, Part # EP 4920829002.
- A set of two (2) volume tabs
- A set of two (2) springs
Step 2:
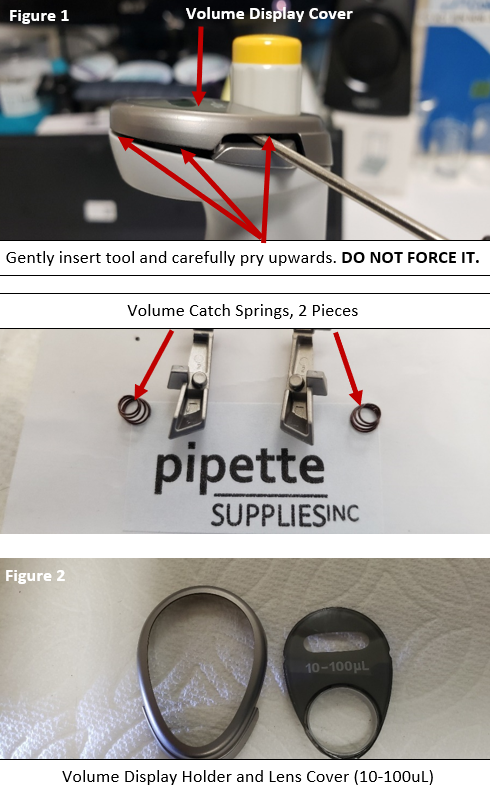
With the small-bladed tool, very carefully and very gently, insert the tool into the left side catch lever, as shown in figure 1.
Gently pry the volume display cover up. DO NOT force it.
Remove and re-insert your small-bladed tool in the right side catch lever and gently pry up. DO NOT force it.
CAUTION: When prying up the volume display cover, be aware that the volume catch springs may pop off and fly out of the pipette when the cover is removed.
Remove and re-insert your small-bladed tool into different areas just underneath the volume display cover and gently pry upward.
Keep repeating gently, as you would to pry off the lid on a can of paint, until the volume display cover comes off. As shown in figure 2.
Step 3:
With the display cover removed, locate and lay aside the following parts:
- Volume Display Holder
- Lens Cover
- Left Volume Catch & Spring
- Right Volume Catch & Spring
Step 4:
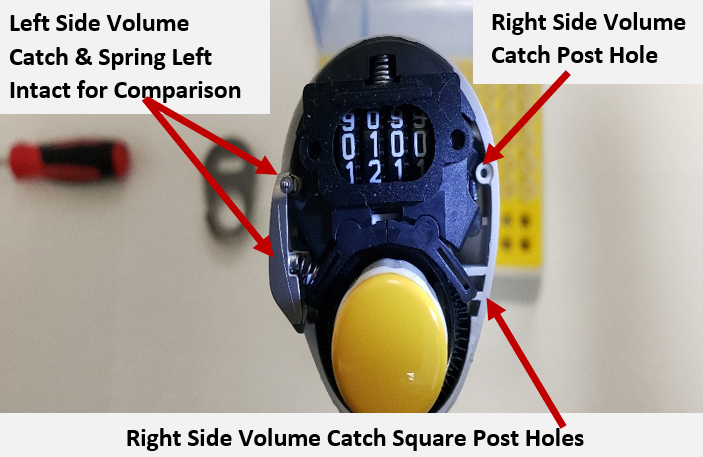
With the right-side volume catch & spring removed, notice the volume catch post hole that the volume catch will sit in when reassembled.
Secondly, notice the two (2) somewhat square post holes that the other end of the volume catch will sit on and spring location/position.
Double check all work. Ensure all parts are accounted for and/or new parts are available for installation before progressing to reassembly.

Observations of New Volume Catch & Preparations for Reassembly
Step 5:
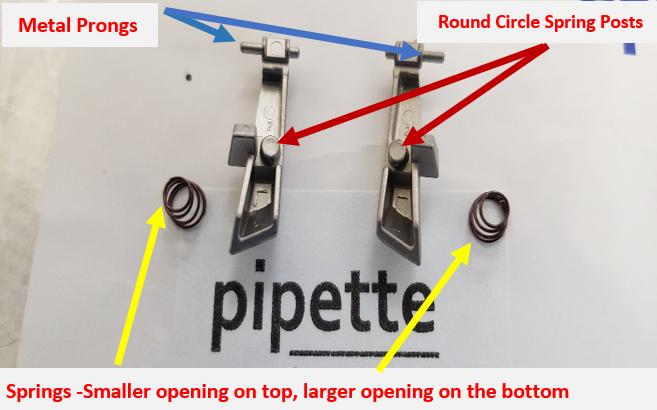
Inspect your new replacement volume catch and pay special attention to the following:
- Springs – smaller end and larger end (if applicable)
- Round circle spring post mounts on the volume catch
- The metal prongs protruding from the top of the volume catch.
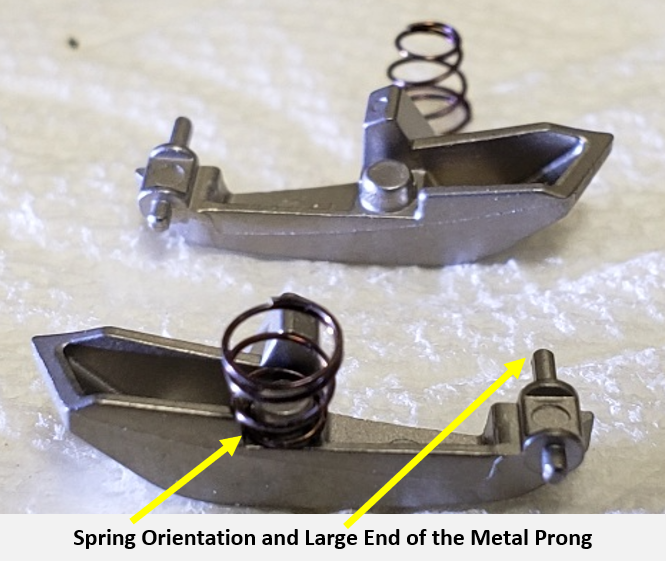
Observation 1:
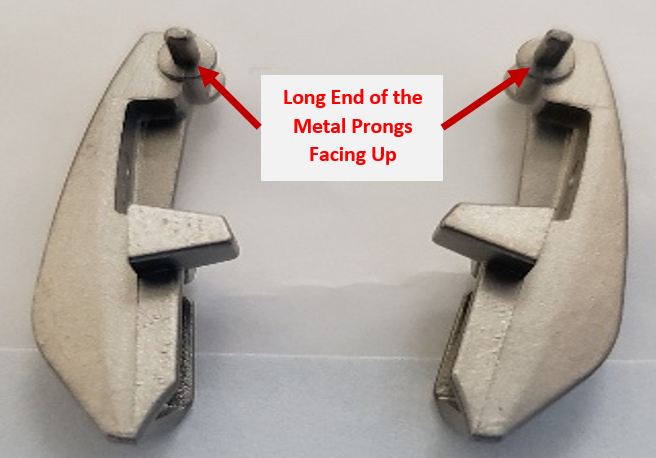
The volume catches pictured here are positioned in the orientation of how they would look if you were looking up from inside the counter assembly. Notice the metal prongs have the short end of the post facing down and the longer end of the metal post is facing up.
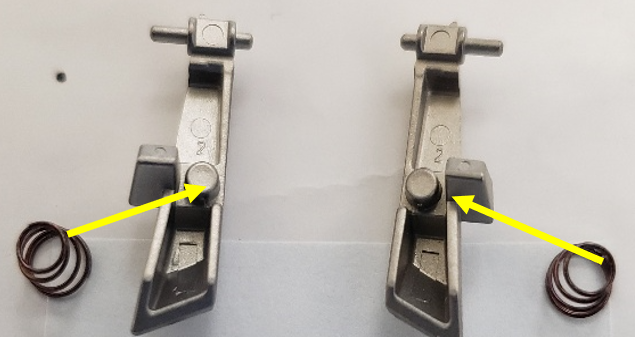
Observation 2:
The volume catches pictured below are rotated with the underneath side facing up. Practice installing the small end of the spring onto the round circle spring posts. Note: Be aware during installation of the volume catch onto the pipette. The spring(s) my pop or fly off a few times until you master the installation process. Maintain keen eyes during this process.
Observation 3:
Close-up photo of the spring installed onto the volume catch. The other spring is positioned small side up for better visualization.
Notice the orientation of the longer end of the metal prong. This is the portion that is installed into the pipette body
The shorter prong is what is attached to the volume display cover.
Observation 4:
Close-up photo of the springs installed onto the volume catch. The small end of the spring is installed first.
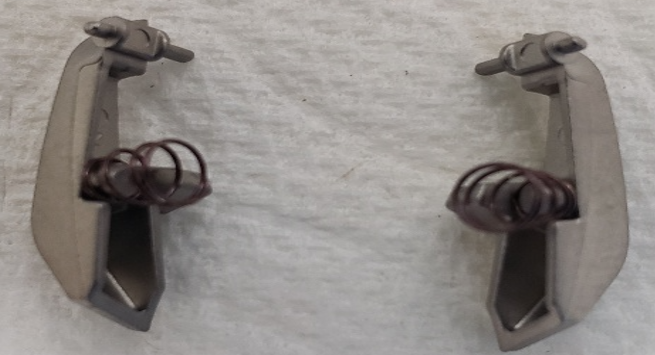
Observation 5:
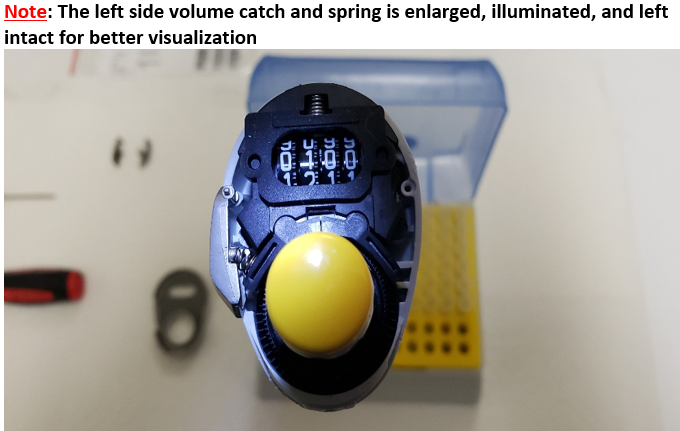
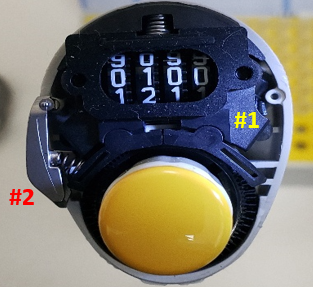
Enlarged photo of the right-side volume catch removed. (#1 below)
Left Side volume catch already installed for better visualization. (#2 below)
Volume Catch Installation and Re-Assembly
Step 6:
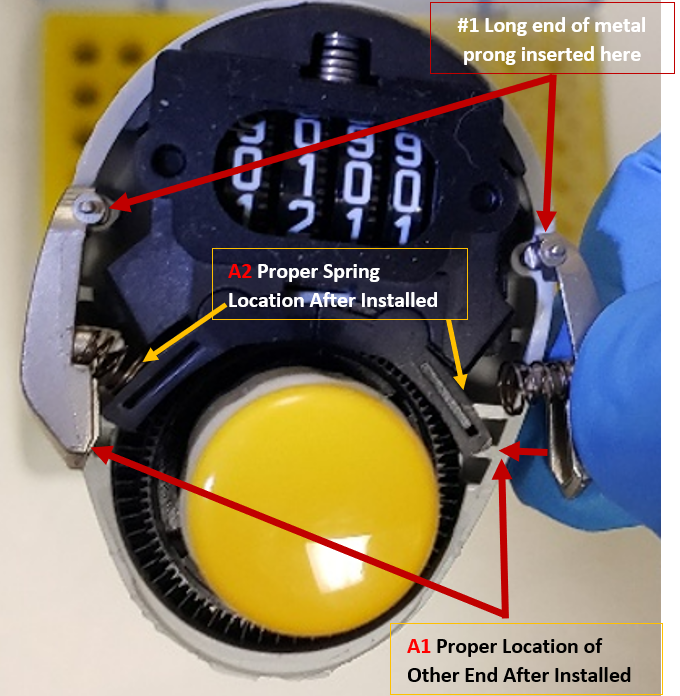
With the small end of the spring already inserted onto the volume catch:
(1) Insert the long end of the metal prong into the round hole in the pipette body, as shown.
(2) Place the other end of the volume catch on top of the square holes, A1 until secure.
Note: When the lower end of the volume catch is properly installed, the spring will now be resting against “A2” and will be under tension. Do not bump or it will fly off and you will need to repeat the process.
This is the most tedious process and make take 3-5 times before mastered and the volume catch is properly installed.
Step 7:
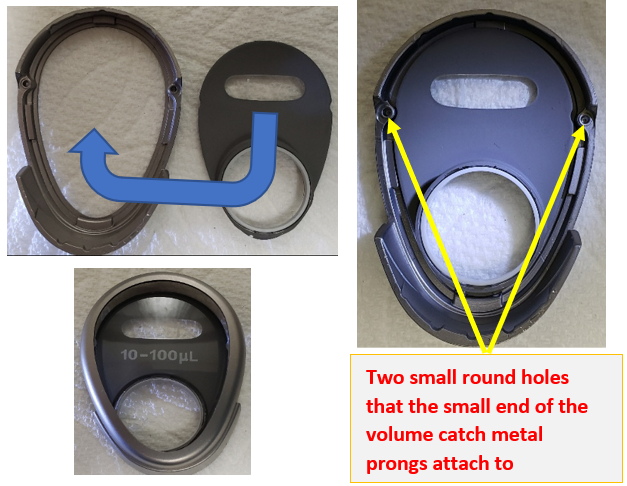
Insert the lens cover into the volume display holder.
Notice the two small round holes on the inside of the volume display holder. These are the posts that the short end of the metal prongs of the volume catch insert into when the volume display cover is installed back onto the pipette.
Step 8:
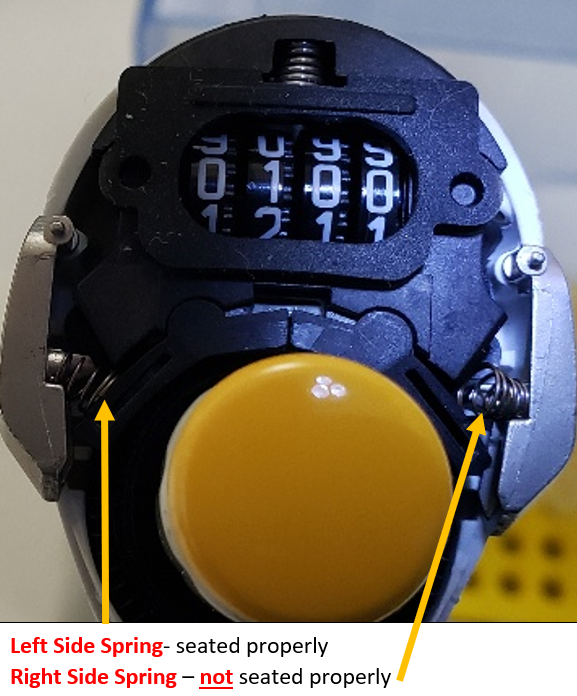
Double check that the volume catch and springs are still properly seated and in place, as shown here. If YES got to Step 9. If NO, re-install properly.
Step 9:
Once the volume catch and springs are properly positioned, install the volume display cover back onto the Reference 2 pipette until it snaps in place. Ensure there are no gaps, and that everything is snug.
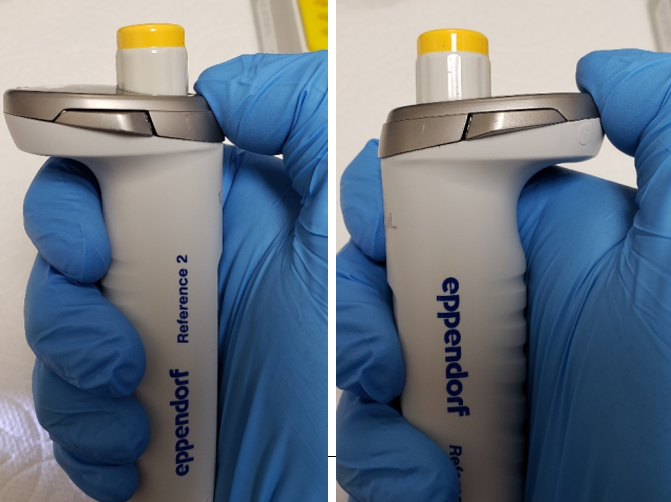
Test the levers by pushing in on them and adjusting the volume. Recheck work as necessary. In some cases, calibration of the pipette may be required to ensure accuracy and precision is maintained.
Related Posts:
How to Calibrate an Eppendorf Research Plus Fixed Pipette
Eppendorf Repeater M4 “CO2 ERR” Message
Eppendorf Repeater Plus C-4 Error
What is the use for the Eppendorf reducing tube and why does it need to be replaced?
Top 10 Crimes Committed Against Pipettes
Disclaimer: Any action you take using the information on this website is strictly at your own risk. The information herein does not constitute professional advice and is general in nature. We make no warranty that this information will meet your requirements, be safe, accurate, or error-free. Pipette Supplies, Inc. is not responsible for any errors or omissions, any results obtained from the use of this information, or any loss or damage arising out of the use of this information. This site is for educational purposes only.
Fair Use: Copyright Disclaimer under section 107 of the Copyright Act of 1976, allows for “fair use” for purposes such as comments, criticism, teaching, scholarship, news reporting, and research.
Fair use is permitted by copyright statute that might otherwise be infringing.

