Xplorer Battery Replacement Overview:
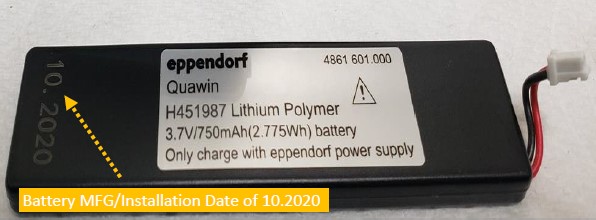
The Eppendorf Xplorer uses a 3.7V, 750mAh Lithium Polymer battery that provides many hours of reliable use and operation. In most cases, the battery will provide between 300-500 complete recharging cycles before replacement is needed. This equates to roughly 3-5 years with proper use. With this battery, the mfg./install date was 10.2020 meaning possible replacement could occur between October 2023-2025.
Pipette Supplies Catalog Numbers:
- Replacement Battery: EP 4861601000
- Power Supply with Power Plug Adapters / Pipette Charger: EP 4986603005
- Charger Carousel 2 Stand: EP 3116000023
Of course, battery replacement depends on several factors including but not limited to:
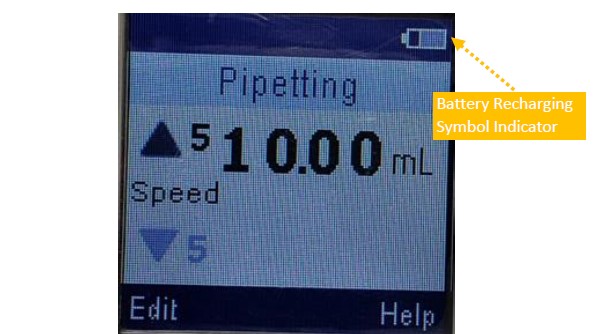
- Will it recharge? What does the LCD battery logo show?
- Are you using the manufacturer recommended wall power supply (WPS) and recharging stand? (strongly recommended)
- Are you storing the pipette and battery in a cool, comfortable, and ambient-like conditions?
- When not in use, is the battery being stored at 40%-50% of capacity to help prolong battery life?
- Remember: DO NOT over charge or over discharge battery. Most pipettes have built in processes to regulate this from occurring, but it’s worth noting.
Xplorer Battery Replacement Instructions
Step 1:
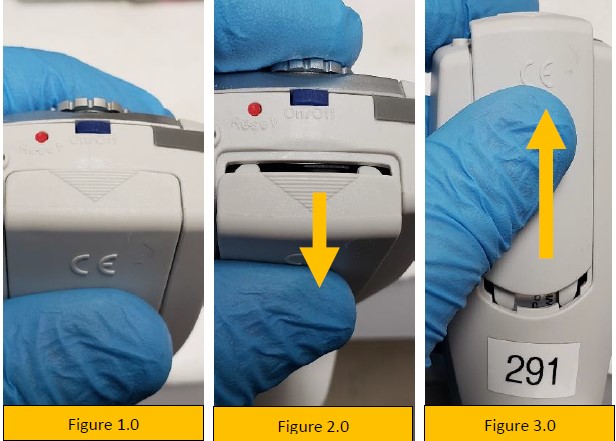
Gently pry open the battery door by lifting outward, as shown by the triangle logo on the battery door (figure 2.0).
Step 2:
Slide battery door upward (figure 3.0) and remove fully. Lay it aside.
Step 3:
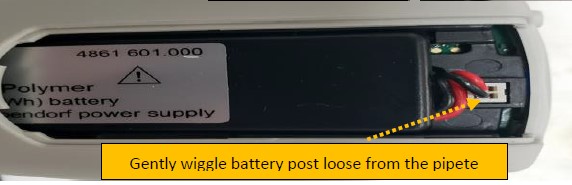
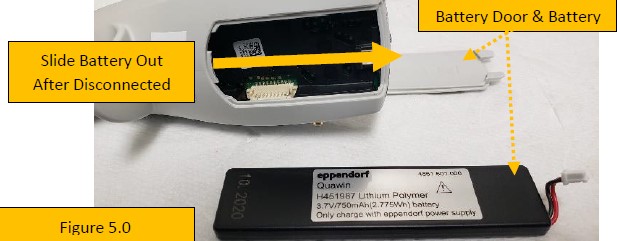
With the battery door removed, gently wiggle the white colored battery post until it unplugs from the pipette (figure 5.0).
Step 4:
After disconnecting the battery, slide it up and out of the battery compartment (figure 5.0).
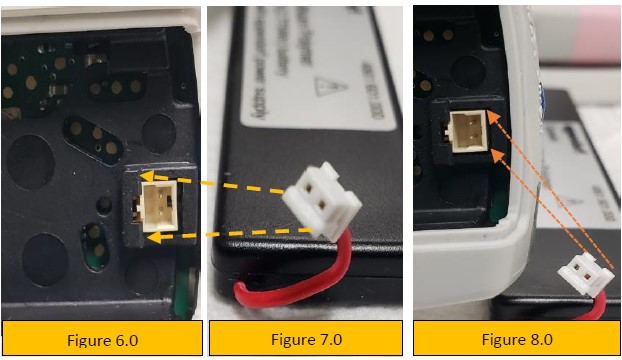
Step 5:
Notice the pin alignment of the battery port and the port itself (figures 6.0, 7.0, and 8.0). This is important for proper battery alignment and insertion.
Step 6:
Slide the new battery into the pipette battery compartment (figure 9.0).
Step 7:
Align, connect, and plug-in the battery to the battery port (figures 6.0, 7.0, 8.0 and 10.0).
Step 8:
Slide the battery compartment door onto the pipette (figure 11.0).
Step 9:
As shown in figure 12.0, snap the battery door back into place with your thumb and index finger until it looks like figure 13.0.
Step 10:
Turn on the pipette and recharge the new battery until fully charged. Approximately 60-90 minutes.

Related Posts:
Eppendorf Research Plus Sealing Ring Replacement – 1000uL
Eppendorf Reference 2: How to Replace the Volume Catch (and Access the Counter Assembly)
The Reality of Electronic Pipette Calibration
Electronic Pipette Error Message
Disclaimer: Any action you take using the information on this website is strictly at your own risk. The information herein does not constitute professional advice and is general in nature. We make no warranty that this information will meet your requirements, be safe, accurate, or error-free. Pipette Supplies, Inc. is not responsible for any errors or omissions, any results obtained from the use of this information, or any loss or damage arising out of the use of this information. This site is for educational purposes only.
Fair Use: Copyright Disclaimer under section 107 of the Copyright Act of 1976, allows for “fair use” for purposes such as comments, criticism, teaching, scholarship, news reporting, and research.
Fair use is permitted by copyright statute that might otherwise be infringing.
