
The process of performing a Microman / Microman E / Pos-D calibration adjustment should always be the last option. Verifying that all other components are in good working condition and part replacement, as needed, should be done first. Pipette damage and lost parts may occur if attention to detail is not maintained. Please proceed at your own risk.
Required Microman Calibration Adjustment Tool:
Locking Cap Lever Tool – GI F148172
NOTE: For illustration purposes, these instructions focus on the Gilson Microman. The instructions below and the locking cap lever tool can also be used with the Gilson Micronman E and Rainin Pos-D.
Printable Calibration Log
Printable Calibration Stickers (for use with Avery 5960 labels)
Microman Calibration Instructions
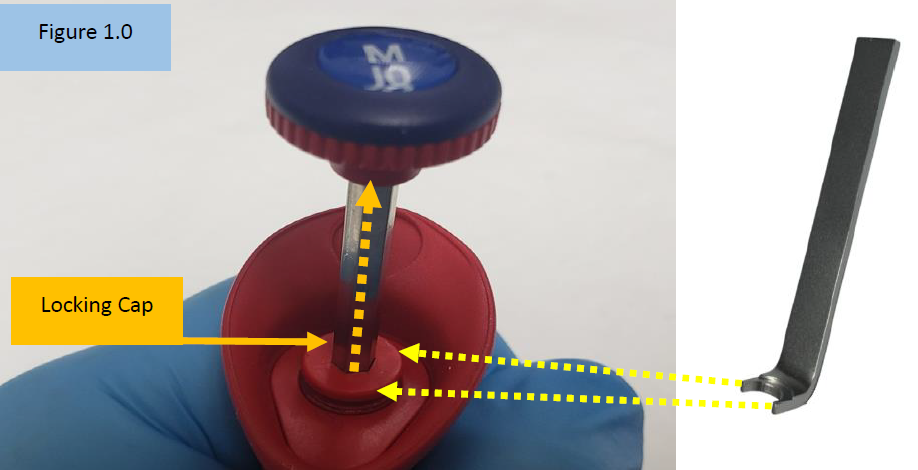
Step 1:
Insert the open end of the Locking Cap Lever Tool into the Microman locking cap. Figure 1.0.
Once inserted into the locking cap, pry the locking cap upward.
Step 2:
Notice the locking cap is now lifted upward and out of the pipette body.
CAUTION: With the locking cap now lifted upward, any movement of the adjustment knob will affect the calibration.

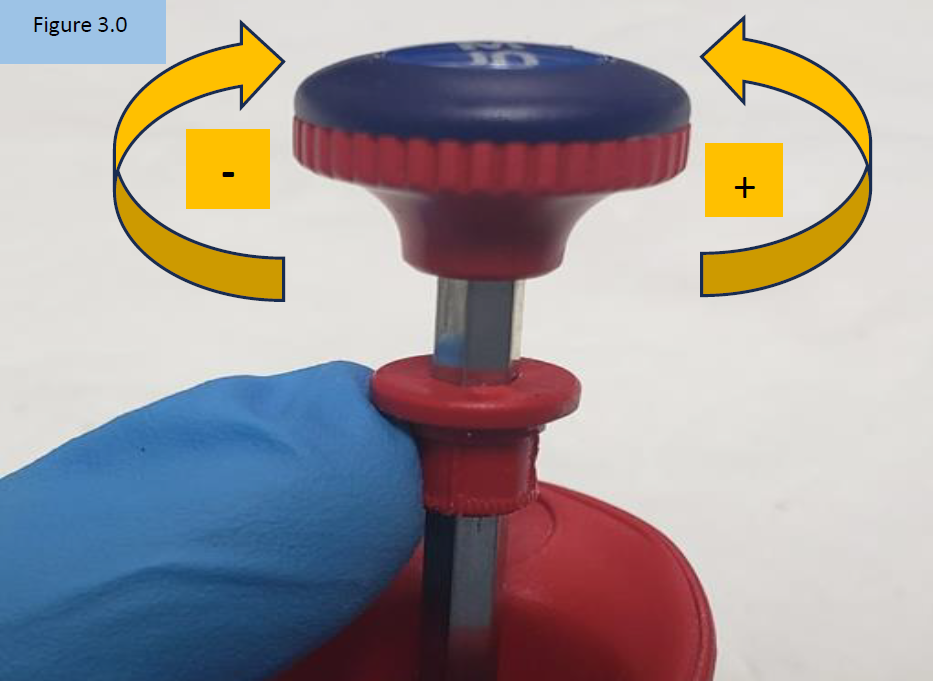
Step 3:
Rotate the adjustment knob:
A. Counter-clockwise to increase the volume aspirated and dispensed ( + )
B. Clock-wide to decrease the volume aspirated and dispensed ( – ), Figure 3.0
NOTE: Only turn the adjustment knob 1/8th of a turn at a time. Large turns will grossly affect desired results. For best results, it’s recommended to make adjustments at the 10% volume.
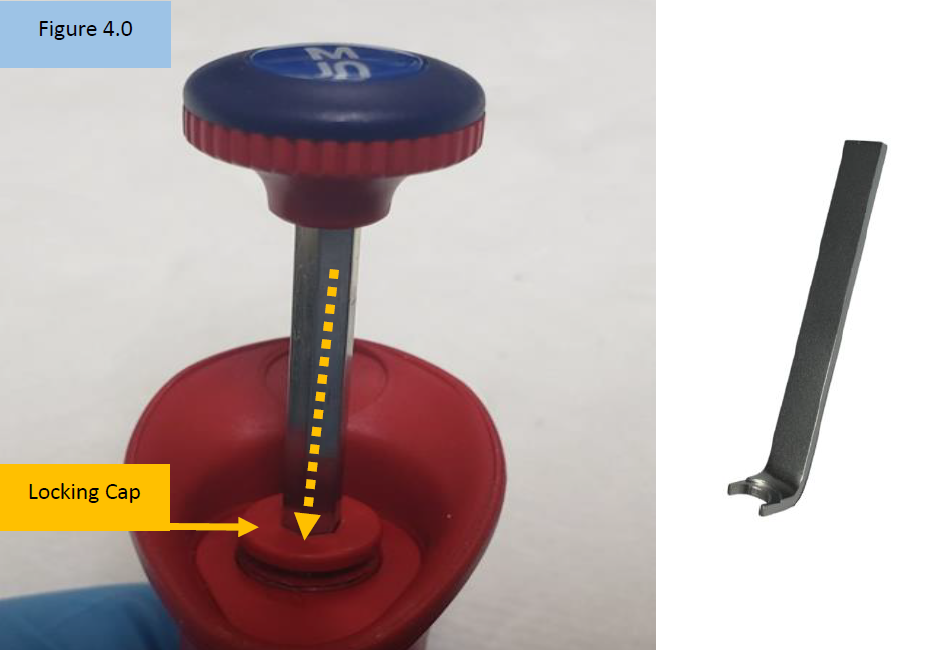
Step 4:
Insert the open end of the Locking Cap Lever Tool into the Microman locking cap. Push it back down into the body opening until it clicks back into place. Ensure it is fully in place. Figure 4.0.
Step 5:
Check the calibration adjustment made on a 4-5 place analytical balance. Repeat steps 1-5 if additional calibration adjustment is needed.
Related Posts:
Gilson Microman Inspection, Spring/Clamp Replacement, and Preventive Maintenance
Gilson Pipette Legend
Rainin Pipette Legend
Disclaimer: Any action you take using the information on this website is strictly at your own risk. The information herein does not constitute professional advice and is general in nature. We make no warranty that this information will meet your requirements, be safe, accurate, or error-free. Pipette Supplies, Inc. is not responsible for any errors or omissions, any results obtained from the use of this information, or any loss or damage arising out of the use of this information. This site is for educational purposes only.
Fair Use: Copyright Disclaimer under section 107 of the Copyright Act of 1976, allows for “fair use” for purposes such as comments, criticism, teaching, scholarship, news reporting, and research.
Fair use is permitted by copyright statute that might otherwise be infringing.
