
The process of inspecting, performing preventive maintenance, and replacing/reinstalling parts on the Gilson Microman requires great care. A high attention to detail, patience, and steady hands are required. Please dedicate a good work area with good lighting and space where small parts can be located should they pop/fly out during disassembly. Pipette damage, affected calibration, and lost parts may occur if attention to detail is not maintained. Please proceed at your own risk.
To review before Gilson Microman disassembly:
These instructions are compatible with the Gilson Microman, not the Microman E.
Microman Replacement parts, including the parts listed in this post, can be found here.
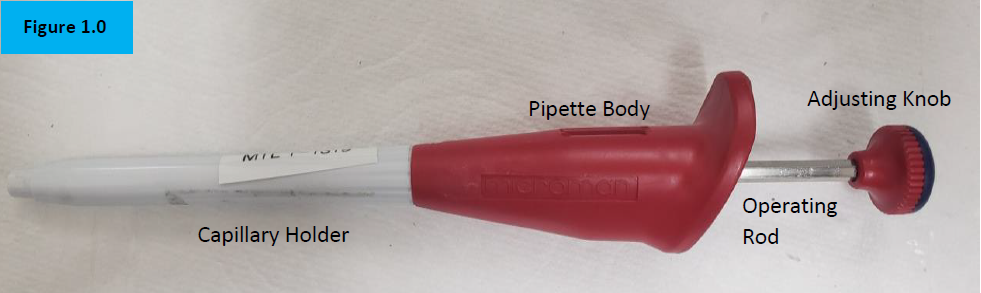
External pipette and parts familiarity (Figure 1.0):
Internal pipette and parts familiarity (Figure 2.0):

Disassembly Process
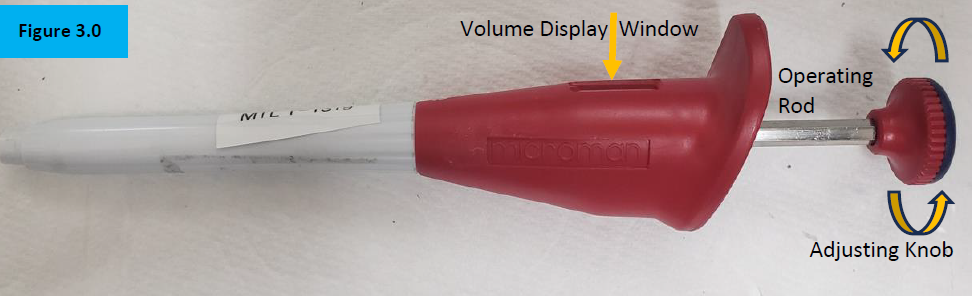
Step 1:
Wind the adjusting knob so that the nominal volume (100%) is displayed in the volume window. Figure 3.0.
NOTE: This will ensure the internal adjusting screw is mostly protected inside of the pipette body prior to disassembly and preventive maintenance.
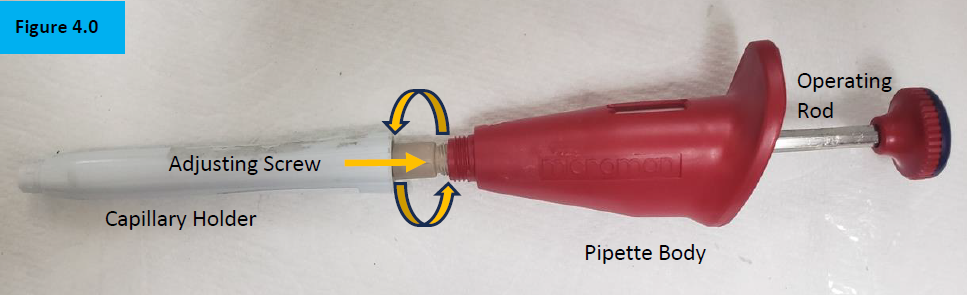
Step 2:
Unscrew the white colored capillary holder from the pipette body. Figure 4.0.
NOTE: Notice the tan/beige colored adjusting screw. This will be mostly visible if the volume is not adjusted to nominal prior to disassembly of the shaft. Take great care not to rotate or turn this component or calibration could be affected.
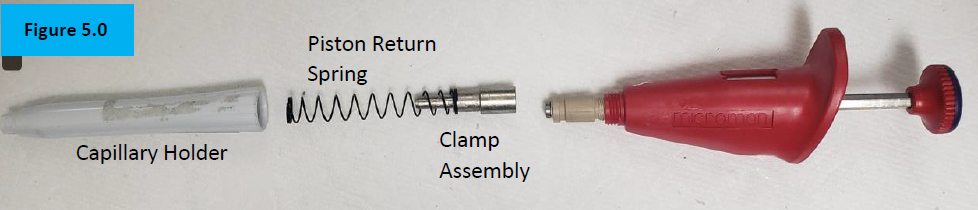
Step 3:
Separate the white capillary holder from the pipette body to expose the internal piston return spring and clamp assembly. Figure 5.0.
Step 4:
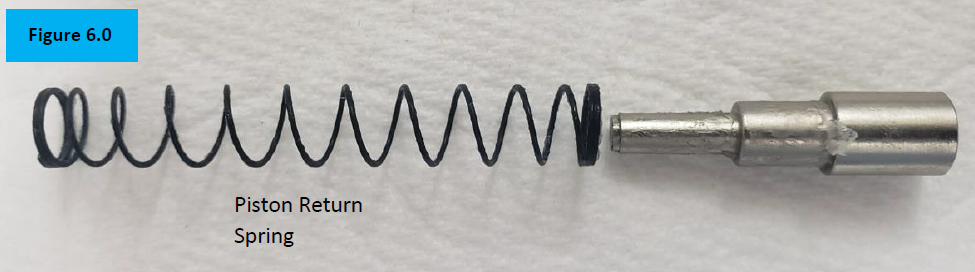
Inspect the piston return spring for cracks, rust, breaks. Replace as needed. Figure 6.0.
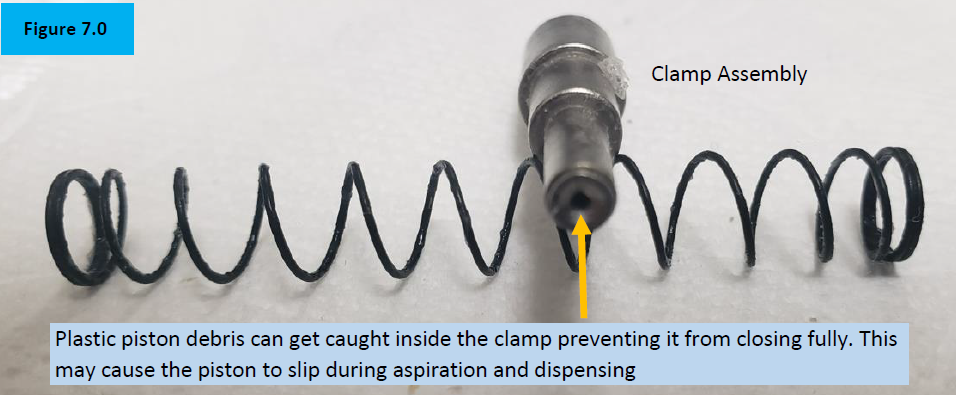
Inspect the clamp assembly for rust, chemical splash, and/or plastic piston debris that could be caught inside the clamp teeth. Figure 7.0.
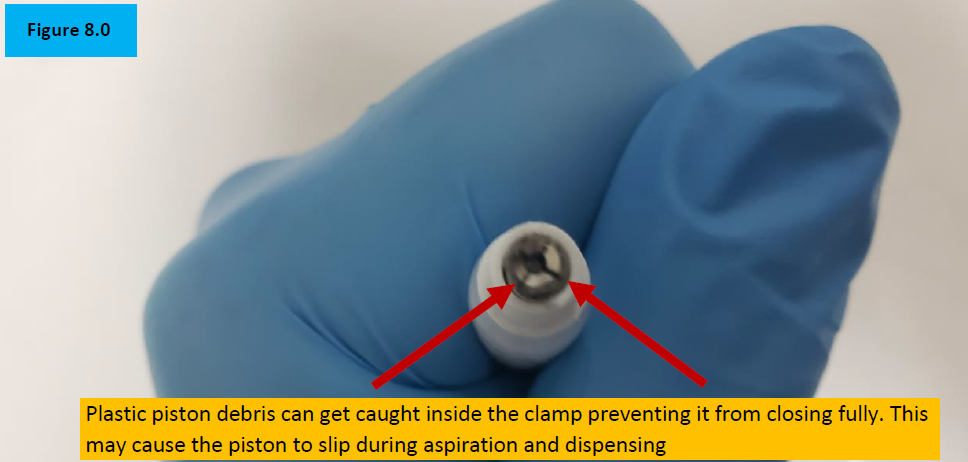
Inspect inside the clamp assembly for plastic shavings or debris that can prevent the clamp assembly from opening and closing fully. Replace as needed. Figure 8.0.
Reassembly Process
Step5:
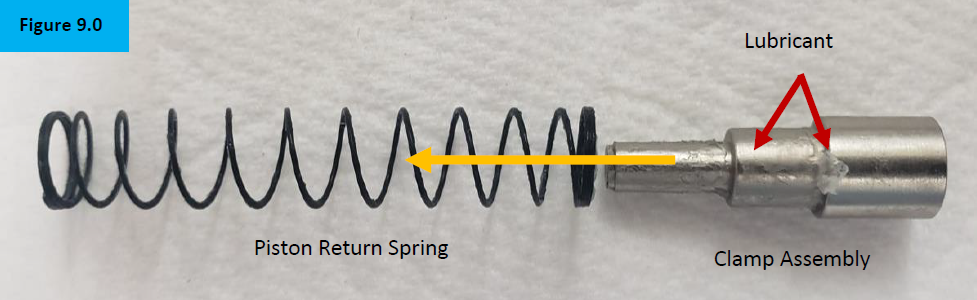
Insert the clamp assembly into the piston return spring. Figure 9.0.
NOTE: If desired, a small amount of lubricant can be applied to the outside of the clamp assembly to help provide a quieter piston return spring during aspiration and dispensing.
Step 6:
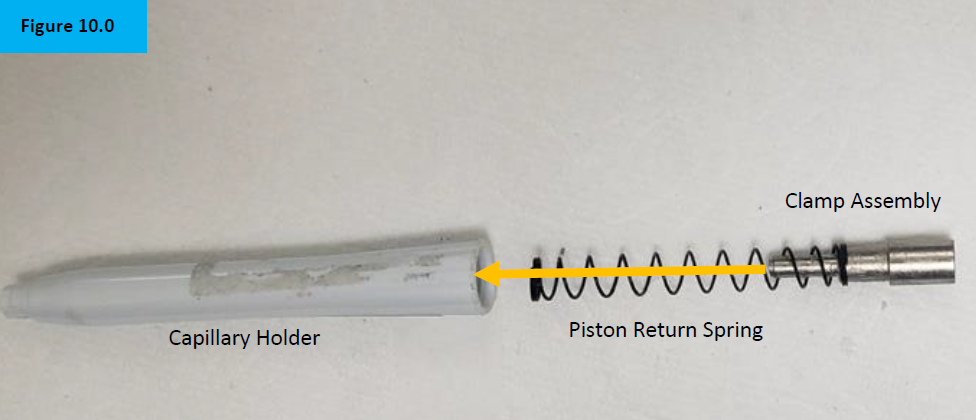
Slide the piston return spring and clamp assembly inside the capillary holder. Figure 10.0.
Step 7:
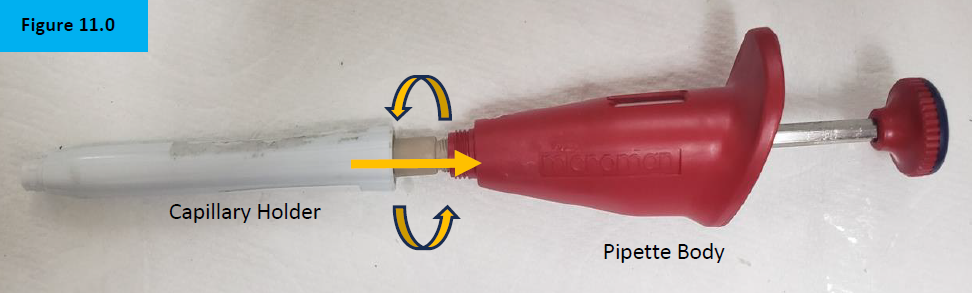
Screw on and attach the capillary holder to the pipette body. Figure 11.0.

Step 8:
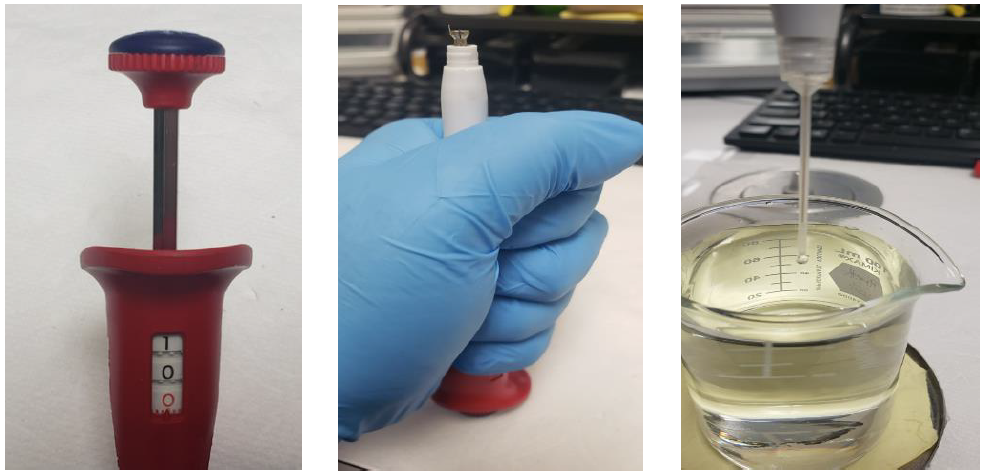
Check for functionality, accuracy, and precision with Di Water and an appropriate analytical balance. Recheck work as necessary.
Related Posts:
Gilson Pipette Legend
General Troubleshooting – Liquid Leak Test Testing & 12 Point Pipette Inspection
Top 10 Crimes Committed Against Pipettes
Pipette Parts – Life Span, Life Cycle, and Performance
Disclaimer: Any action you take using the information on this website is strictly at your own risk. The information herein does not constitute professional advice and is general in nature. We make no warranty that this information will meet your requirements, be safe, accurate, or error-free. Pipette Supplies, Inc. is not responsible for any errors or omissions, any results obtained from the use of this information, or any loss or damage arising out of the use of this information. This site is for educational purposes only.
Fair Use: Copyright Disclaimer under section 107 of the Copyright Act of 1976, allows for “fair use” for purposes such as comments, criticism, teaching, scholarship, news reporting, and research.
Fair use is permitted by copyright statute that might otherwise be infringing.

