Ever needed to repair a Pipetman counter assembly?
For Pipetman G, Neo, and Classic:
First, determine what necessitates the repair. If one of the propelling gears has a broken tooth, the repair is not so simple. These repairs should only be attempted by a service provider.
If the malfunction is due to the counter assembly being out of alignment because:
- One or more of the rotating wheels has jumped off the track (from over winding)
- The pipette had a trauma (possibly falling too many times on the floor)
It can be easily repaired by following procedure:
Unwind or start rotating the counter assembly towards its highest reading (1000ul towards 1000 etc.) either holding from the area where the friction ring is, or just rotating the plunger button (depending on the Pipetman model). When the knob with the friction ring reaches the upper end of the pipette body, it will require extra force to turn and may require pliers. Rotating past that point, you will need to add the “pulling out” motion to the rotating motion. At a certain point, the micro-bolt (the one with threaded circumference and a groove on its length) will freely come out.
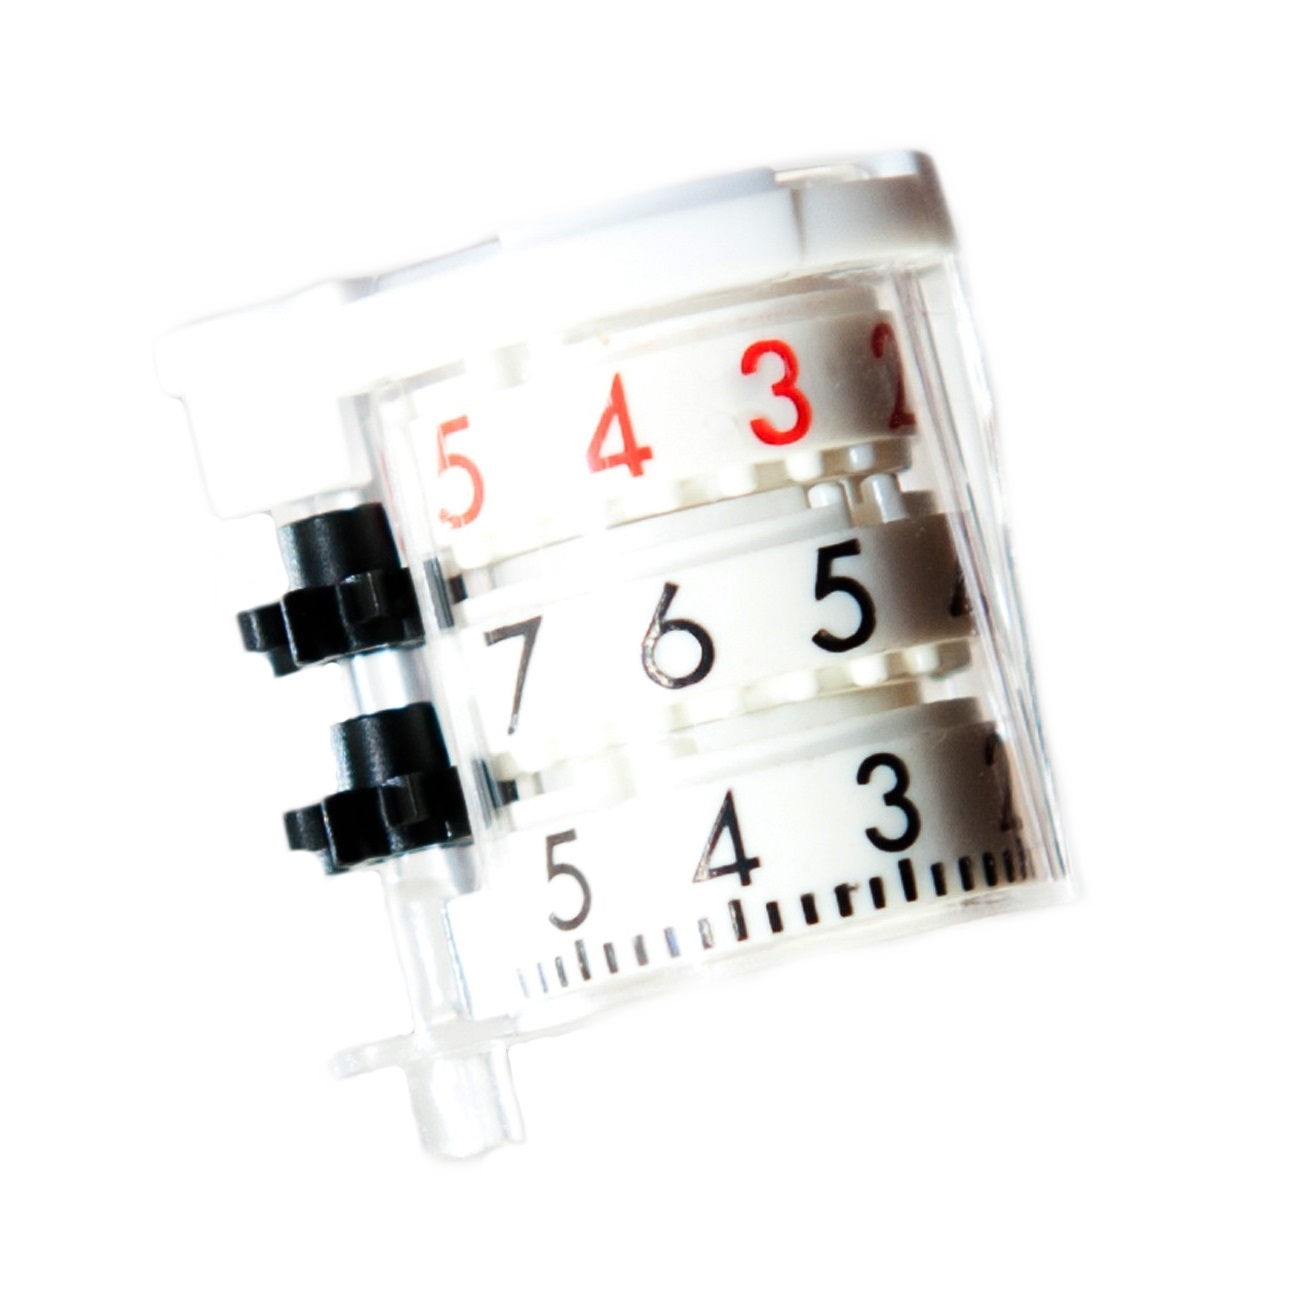
Look inside the cavity where the micro-bolt came out. There should be a white tab protruding from the inside diameter of the rotating rings that bear the numbers on them which you read in the counter window. With a very thin screwdriver or extended forceps, turn the tab clockwise or counter clockwise to reach the following readings in the counter window (it may take many turns):
Models P10, P100, P1000, P10ML = 130 – 133
Models P2, P20, P200 = 310 – 315
Model P5000 = 630 – 675
Reinsert the micro-bolt assembly into the Pipetman body without rotation of the volume display. Note: The tab inside the body must align with the groove on the micro-bolt.
Finally, gravimetrically test the pipette on a balance to verify accuracy and precision.
For Pipetman L:
Thanks to the comment below, we would like to clarify that the instructions for the Pipetman L contain only one difference: you need to remove the lock/unlock assembly before you can access the counter assembly. Use the Pipetman L Cap spanner tool to do this, GI FA07052.
Disclaimer: Any action you take using the information on this website is strictly at your own risk. The information herein does not constitute professional advice and is general in nature. We make no warranty that this information will meet your requirements, be safe, accurate, or error-free. Pipette Supplies, Inc. is not responsible for any errors or omissions, any results obtained from the use of this information, or any loss or damage arising out of the use of this information. This site is for educational purposes only.
Fair Use: Copyright Disclaimer under section 107 of the Copyright Act of 1976, allows for “fair use” for purposes such as comments, criticism, teaching, scholarship, news reporting, and research.
Fair use is permitted by copyright statute that might otherwise be infringing.


Can these instructions be used for the Pipetteman L series?
Great question!
For the most part, yes. The only difference is the need to remove the lock/unlock assembly before you can access the counter assembly. The Pipetman L Cap spanner tool will allow you to do this, GI FA07052.